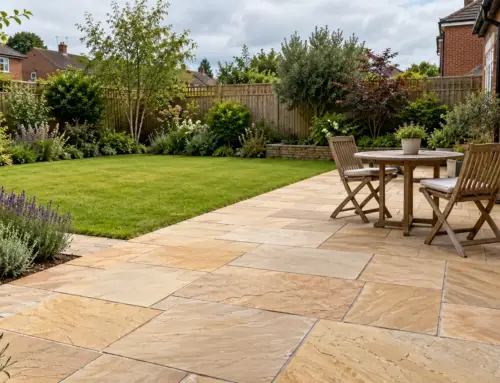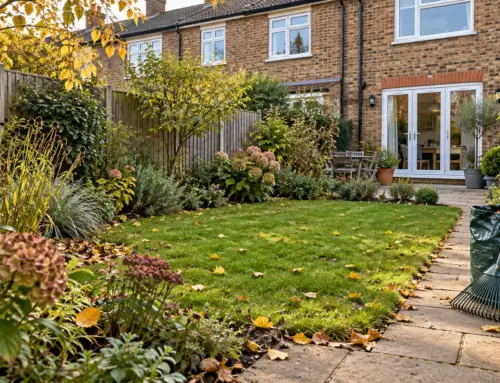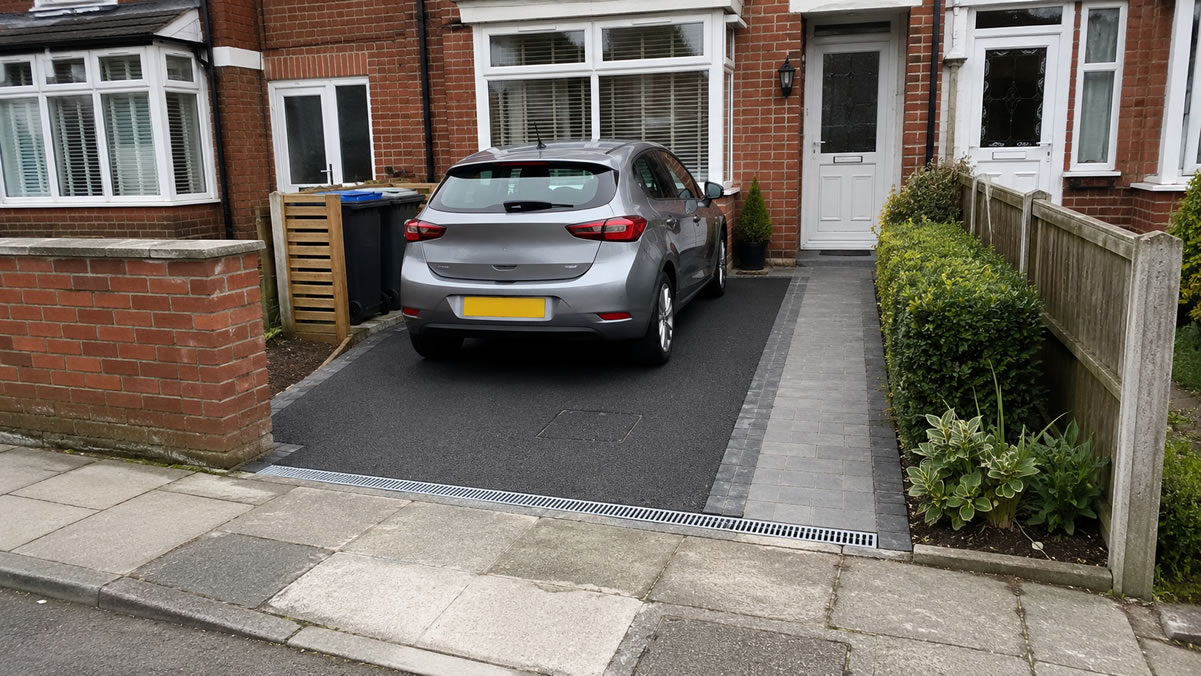


A new patio should provide a firm, attractive area for sitting, dining and moving around the garden. However, even expensive paving can become frustrating if rainwater collects in puddles or runs towards the house.
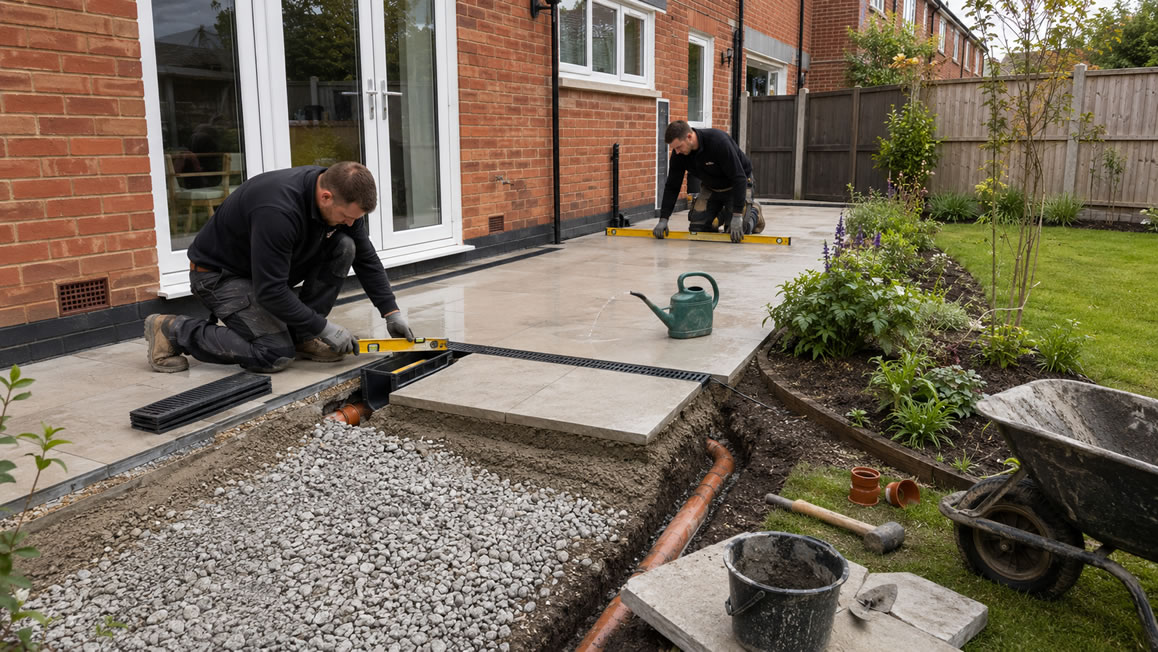
Patio drainage installation starts with the levels beneath the slabs. The contractor must create a suitable fall, build a stable base and decide where the collected water will go. Depending on the garden, the design may also include a linear drainage channel, permeable paving, a rain garden or a properly sized soakaway.
Adding a channel beside the house does not automatically solve the problem. The channel still needs a suitable outlet, while the paving must guide water towards it. For that reason, drainage should form part of the patio design from the beginning rather than becoming an extra detail after the slabs have been laid.
This guide explains the main patio drainage options, warning signs of a poor installation and what homeowners should compare when requesting quotations.
Why Does a Patio Need Drainage?
Most traditional paving slabs do not allow much water to pass through their surface. Rain therefore flows across the patio, enters the joints or remains in low spots.
Without an effective route away, water can cause several problems:
- puddles that make the patio difficult to use;
- algae and moss that create slippery patches;
- staining and dirty splash marks on walls or doors;
- saturated joints and bedding materials;
- frost damage during cold weather;
- erosion around the edges of the paving;
- settlement where the sub-base becomes unstable;
- damp problems if levels or falls direct water towards the house;
- runoff into a neighbour’s garden.
Small puddles sometimes disappear once the rain stops. Nevertheless, repeated standing water usually indicates that the surface lacks the correct fall, contains local depressions or has a blocked outlet.
Good drainage does not mean removing water from the garden as quickly as possible. Where ground conditions permit, slowing and absorbing rainfall within the property can reduce pressure on drains and help planting. The best solution manages water safely without creating problems elsewhere.
Patio Falls: The First Part of the Drainage Design
A patio may look level, but it should normally have a subtle slope known as a fall. This directs surface water towards a safe edge, channel or planted area.
The fall should generally carry water away from buildings. However, direction alone is not enough. The low edge must have somewhere suitable for the water to drain.
Paving manufacturers publish installation requirements for their products. As one example, Global Stone’s laying guidance recommends a fall of 1:60 or steeper for its natural-stone paving, with an adequate drainage outlet at the lower edge. Product guidance and site conditions should always take priority over a generic figure.
A 1:60 fall means the level drops by one unit for every 60 units of horizontal distance:
| Patio run | Approximate drop at a 1:60 fall |
|---|---|
| 2 metres | 33mm |
| 3 metres | 50mm |
| 4 metres | 67mm |
| 5 metres | 83mm |
These figures illustrate the principle rather than setting a specification for every patio. Surface texture, thresholds, accessibility, drainage position and manufacturer instructions may require a different design.
The contractor should establish levels with pegs, string lines, a long spirit level or a laser before laying the sub-base. The same fall needs to continue through the prepared layers and finished paving. Trying to create all the slope within a thin or uneven mortar bed can lead to weak support beneath the slabs.
Where Should Patio Water Go?
The drainage outlet should be identified before excavation begins. Suitable options depend on the soil, garden layout, patio size and existing drainage.
Water may be directed to:
- a lawn or planted border that can absorb it safely;
- a purpose-designed rain garden;
- a suitable soakaway;
- permeable paving with an infiltration sub-base;
- a linear channel connected to an approved surface-water system;
- another lawful on-site drainage arrangement designed for the property.
Do not allow runoff to flow towards the house, across a neighbour’s boundary or onto a public pavement. Surface water should not simply be connected to a foul drain. Planning Portal guidance on drains and sewers explains that foul and surface-water systems should generally remain separate.
Before connecting new drainage to an existing pipe, the contractor needs to identify what that pipe carries, whether it has capacity and whether permission is required. A convenient-looking gully is not proof that the connection is suitable.
Main Patio Drainage Options
Several drainage methods can work, and larger or more complex patios may use a combination.
| Drainage method | Best suited to | Main considerations |
| Correct falls to a soft border | Smaller patios beside absorbent garden areas | The border must accept the water without flooding |
| Linear channel drain | Doorways, walls and defined low edges | Needs a solid foundation, removable grating and suitable outlet |
| Point gully | A local low point with a piped outlet | Requires accurate falls from several directions and regular cleaning |
| Permeable paving | New patios where infiltration conditions are suitable | The surface, bedding and sub-base must work as one permeable system |
| Soakaway | Sites with enough space and ground that accepts water | Requires correct siting, testing, sizing and an accessible route from the patio |
| Rain garden | Landscaped gardens where runoff can be slowed and planted | Needs suitable plants, overflow planning and separation from the building |
| French drain | Selected edges or garden situations | Must have a real discharge or infiltration function rather than becoming a water-filled trench |
Falls towards a lawn or border
Directing water into a planted area can provide a simple and attractive solution. The receiving ground needs to sit below the patio edge and have enough area and permeability to cope with rainfall.
Heavy clay or already saturated soil may not absorb water quickly. In that situation, concentrating the whole patio’s runoff into a narrow flower bed could waterlog plants or push moisture towards a fence and neighbouring garden.
Linear drainage channels
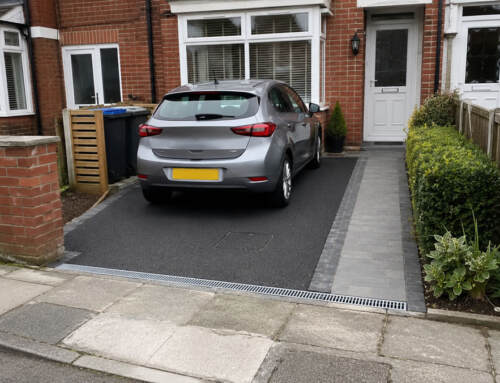
A linear channel, sometimes called a slot drain or channel drain, collects water along a doorway, wall or low patio edge. It normally consists of connected channel sections with removable gratings.
The channel should:
- sit slightly below the adjacent paving;
- follow the required level towards its outlet;
- have firm support that prevents movement;
- use the correct load class for its location;
- include accessible sections for cleaning;
- discharge into a suitable drainage or infiltration system.
Channels are particularly useful outside low thresholds, bifold doors and conservatories. Yet careful detailing remains essential because a narrow drain does not compensate for paving that falls the wrong way.
Point gullies
A point gully collects water in one position. The paving must fall towards it from the surrounding area, which can make slab cutting and level control more complicated.
Gullies can work in courtyards or enclosed patios where water cannot escape over a free edge. However, leaves and silt can block a small grate, so homeowners need access for routine cleaning.
Permeable patio construction
Permeable paving allows rainfall to pass through joints or the surface into a specially designed base. The water then infiltrates the ground or enters a controlled drainage system.
The complete construction matters. Permeable blocks placed over ordinary dense mortar or an impermeable concrete base do not create a fully permeable patio. Similarly, resin-bound aggregate only forms part of a permeable solution when the base and sub-base also allow water to move correctly.
Government guidance on permeable surfacing explains the use of permeable surfaces, soakaways and rain gardens to reduce runoff. Although written for front gardens, it states that the principles can also apply to patios.
Soakaways
A soakaway stores rainwater temporarily and allows it to disperse into the surrounding ground. It may use modular crates or another approved construction wrapped and filled according to the design.
The location and size cannot be guessed. Soil needs sufficient infiltration capacity, while the water table and distance from buildings, roads, boundaries and services all matter. Approved Document H provides drainage guidance for England, and local ground conditions may require a percolation test or specialist design.
A compact rear garden may not offer a compliant or sensible soakaway location. In addition, clay, made ground and high groundwater can make infiltration ineffective. In those circumstances, the contractor should consider another lawful drainage strategy rather than installing a crate that remains full.
Rain gardens
A rain garden is a shallow planted depression that receives and temporarily holds runoff. Suitable soil and plants slow the flow before the water soaks away.
This option can soften the edge of a large patio and support wildlife. It still needs careful positioning, capacity and an overflow route for severe weather. A rain garden should not create a permanently wet area against the house.
French drains
A French drain usually consists of a perforated pipe laid within clean stone and wrapped in a suitable geotextile. It can intercept or convey water in some garden settings.
Contractors sometimes describe any gravel-filled trench as a French drain. Without suitable fall, infiltration or an outlet, the trench may simply store water beside the patio. Ask where the collected water will ultimately go.
Protecting the House from Patio Water
Drainage beside the house requires more than a visible channel. Finished levels and moisture protection also matter.
External paving should normally remain below the damp-proof course. A common benchmark is around 150mm, although accessible thresholds and unusual construction details may need a specifically designed solution. Colchester City Council’s guidance on dampness warns that raising paths or patios can bridge the damp-proof course and lead to damp inside.
The installation should also:
- maintain open air bricks and sub-floor vents;
- avoid covering weep holes;
- direct water away from masonry;
- seal or detail wall junctions correctly;
- protect low door thresholds;
- avoid trapping water between the patio and a raised edge.
A channel beside a wall can provide extra protection, but it should not encourage the paving to be raised too close to the damp-proof course. If a patio must meet a level-access door, seek an appropriate threshold and drainage detail rather than simply lifting the entire surface.
How Drainage Affects Different Patio Materials
Every patio needs water management, although the visible signs and installation details vary by material.
Porcelain paving
Porcelain absorbs very little water, so most rainfall remains on the surface and follows the installed fall. Its regular finish makes small puddles easy to notice. Accurate laying, suitable joints and a defined outlet are therefore important.
Natural stone
Sandstone, limestone, slate and granite have different textures and absorption rates. Riven stone may retain a little water within its natural surface, but broader ponding usually indicates a level problem. The installer should follow the supplier’s laying and drainage advice.
Concrete paving
Concrete slabs are widely used and available in smooth or textured finishes. Poorly supported units can settle and create low spots, so the sub-base and full laying bed contribute to drainage performance.
Block paving
Standard block paving directs water across the surface, while permeable block systems allow it through specially designed joints. The two systems use different aggregates and base construction. Do not assume ordinary blocks become permeable because their joints contain sand.
Resin-bound surfacing
Resin-bound aggregate can create a smooth and porous surface. However, the water still needs to pass through a suitable open base and then infiltrate or discharge safely. Resin laid over solid concrete does not make the full patio permeable.
Retrofitting Drainage to an Existing Patio
An existing patio with standing water does not always need complete replacement. The correct repair depends on the cause.
Possible work includes:
- lifting and relaying a local sunken section;
- replacing failed or washed-out bedding;
- cutting in a linear drainage channel;
- installing a point gully at a genuine low point;
- rebuilding an edge so water can reach a border;
- clearing or repairing a blocked outlet pipe;
- renewing damaged joints;
- lifting and relaying the whole patio with corrected levels.
Adding a channel only works when the slabs can drain towards it and the channel has a suitable discharge. If the patio falls towards the opposite corner, a new strip drain beside the house may collect very little water.
Widespread settlement often points to poor ground preparation or an inadequate sub-base. In that case, repeated local patching may prove less economical than rebuilding the affected area properly.
Why Patio Drainage Systems Fail
Common causes include:
- no planned fall in the paving;
- a fall that directs water towards the building;
- isolated low slabs or rocking paving;
- a channel installed level rather than towards its outlet;
- blocked gratings, silt traps or pipework;
- an outlet connected to the wrong drainage system;
- a soakaway installed in unsuitable ground;
- a permeable surface laid over an impermeable base;
- raised patio levels bridging the damp-proof course;
- an edge or retaining wall trapping runoff;
- movement caused by an insufficient sub-base;
- runoff concentrated into a border that cannot absorb it.
A homeowner may first notice algae, crumbling joints or water marks rather than a large puddle. These clues deserve investigation before further movement or frost damage occurs.
Does Patio Drainage Need Planning Permission?
A normal ground-level patio will not usually need planning permission, although restrictions can apply to listed buildings, designated areas, raised platforms and properties with limited permitted development rights. Significant level changes, retaining structures or work affecting protected trees may also need additional checks.
Planning Portal says that a new patio will generally not require building regulations approval, but alterations must not make access to the home less satisfactory. Work that connects to, alters or builds over drainage can introduce separate requirements and permissions.
Rules vary across the UK. Contact the local authority, sewerage undertaker or a suitable drainage professional when the project affects sewers, shared drains, protected property or uncertain discharge points.
How Much Does Patio Drainage Installation Cost?
Costs depend on whether drainage forms part of a new patio or must be added to existing paving. A short channel with an accessible outlet is very different from lifting slabs, correcting the base and constructing a soakaway.
The quotation may be affected by:
- patio size and amount of runoff;
- excavation depth and ground conditions;
- length and load class of channel drainage;
- number of corners, outlets and inspection points;
- distance to a suitable discharge location;
- soakaway testing, sizing and excavation;
- existing pipes, cables and tree roots;
- lifting and reinstating paving;
- replacement slabs where matching products are unavailable;
- retaining walls, thresholds and steps;
- restricted access for machinery and waste removal;
- disposal of excavated soil and damaged materials.
Ask for an itemised quotation that states where water will go. A low patio installation price for installing grating along one edge has little value if the proposal does not include a working outlet.
How to Plan Patio Drainage Installation
1. Observe the patio during rain
Note where water enters, which direction it moves and how long puddles remain. Check downpipes, garden levels and runoff from nearby paths or outbuildings as well as the patio itself.
2. Survey levels and building details
Identify the damp-proof course, air bricks, thresholds, walls and existing drains. Measure the available level difference between the house and the proposed outlet.
3. Assess the ground and existing construction
The contractor should check soil conditions, sub-base stability and whether existing paving has settled. A proposed soakaway may require infiltration testing and adequate separation from structures and services.
4. Choose the discharge or infiltration point
Decide where water can lawfully and safely go before selecting channels or gullies. Consider soft landscaping, a rain garden, permeable construction, a suitable soakaway or an approved surface-water connection.
5. Design the paving falls
Plan a consistent slope from the patio to the chosen outlet while maintaining suitable levels at the house, doors, steps and garden edges. Follow the paving manufacturer’s recommendations.
6. Select compatible drainage components
Choose channels, gratings, gullies, pipes and silt traps that suit the location and expected use. Make sure components remain accessible for cleaning.
7. Install and test the complete system
Build the sub-base and laying course to the designed levels, secure the drainage components and complete the outlet. Test the route with water before final handover.
8. Maintain the drainage
Sweep leaves and soil from the patio, lift removable gratings and clear outlets periodically. Investigate new puddles, settlement or slow drainage promptly.
Questions to Ask Patio Contractors
Before accepting a quote, ask:
- What fall will you create and in which direction?
- Where will the water discharge or infiltrate?
- Is the proposed connection for surface water and is it authorised?
- Will you maintain safe clearance below the damp-proof course?
- How will you protect air bricks and door thresholds?
- Does the ground suit a soakaway or permeable system?
- What sub-base and bedding specification will you use?
- Are channels, pipes, outlets and silt traps included?
- Can the drainage be accessed for cleaning?
- How will you test the installation before completion?
- Are excavation, waste removal and reinstatement included?
- What workmanship guarantee applies?
Detailed answers make quotations easier to compare. They also reveal whether the contractor has designed a complete drainage route or simply priced a row of channels.
Maintaining a Patio Drainage System
Routine maintenance is usually straightforward. Sweep the patio regularly so leaves, soil and jointing debris do not wash into channels. Lift removable grates carefully and clear silt at suitable intervals.
Keep the outlet into a border, rain garden or soakaway free from dense roots and accumulated debris. If a channel remains full after rain, the downstream pipe may be blocked or the infiltration feature may be saturated.
Pressure washing can push large amounts of debris into narrow outlets. Before cleaning the paving, remove loose material and protect or clear drainage components as recommended by their manufacturer.
Movement, persistent ponding and repeated joint failure are not normal maintenance issues. Ask a paving or drainage contractor to inspect the levels and base rather than repeatedly filling the same cracks.
Frequently Asked Questions
Does every patio need a drainage channel?
No. A small patio may drain safely over its lower edge into a suitable lawn or border. Channels are useful near doors, walls or enclosed edges, but they must form part of a complete route to an appropriate outlet.
Which way should a patio slope?
A patio should normally fall away from buildings towards a safe drainage or infiltration point. The direction, gradient and outlet should be planned together rather than allowing water to collect at the low edge.
What fall should a patio have?
Requirements vary by paving and site. Some manufacturers recommend around 1:60 for patio paving, which equals approximately 50mm of drop over three metres. Always follow the chosen product’s guidance and the installer’s site-specific design.
Can a patio drain into a flower bed?
Yes, when the bed is lower, large enough and sufficiently permeable to accept the runoff without waterlogging or sending water onto neighbouring land. Heavy clay or a narrow enclosed border may need another solution.
Can patio drainage connect to a household drain?
Only when the existing drain has been correctly identified and the connection is suitable and authorised. Surface water and foul drainage should generally remain separate. Seek professional advice before making a connection.
How far below the damp-proof course should a patio be?
External paving is commonly kept around 150mm below the damp-proof course. Different threshold or building details can require a designed alternative, so do not raise the patio without checking the construction.
Will a French drain fix a waterlogged patio?
Only if it can intercept the water and convey or infiltrate it safely. A gravel trench without a suitable fall, outlet or infiltration capacity may simply hold water beside the patio.
Can drainage be added without replacing the whole patio?
Sometimes. A contractor may be able to relay a sunken area, open a lower edge or install a channel and outlet. Widespread poor falls or base failure may require more extensive lifting and relaying.